Last summer I planted a row of heirloom carrots, zucchini, and Swiss chard in a raised bed that had been sitting bare for months. The seedlings emerged, but the soil dried out quickly and weeds fought for every inch of sunlight. After swapping out the old, compacted material for a fresh layer of the right mulch, the garden held moisture, stayed cooler, and the weeds disappeared almost overnight. In this guide you’ll learn exactly how to pick the best mulch for vegetable garden beds, what supplies you need, and step‑by‑step how to install it for maximum yield.
In This Article

What You Will Need (or Before You Start)
- Mulch material – choose one of the proven options below (straw, shredded leaves, compost, black plastic, or pine bark). I recommend 2–4 inches depth for most vegetables.
- Measuring tape – to calculate square footage.
- Garden rake – for spreading and leveling.
- Wheelbarrow or sturdy bucket – to transport mulch.
- Landscape fabric (optional) – adds an extra barrier against weeds.
- Gloves and dust mask – especially when handling dry leaf or bark mulch.
Before you start, clear any existing weeds, loosen the top 2 inches of soil with a fork, and water the bed thoroughly. This pre‑watering helps the mulch settle and prevents the “dry‑soil” smell that can attract pests.
Step 1 – Calculate the Area and Mulch Volume
Measure the length and width of each vegetable bed. Multiply length × width to get square footage. For a 4 ft × 8 ft raised bed, that’s 32 sq ft. Mulch volume is area × depth. At 3 inches depth (0.25 ft), you need 32 sq ft × 0.25 ft = 8 cubic ft of material.
Most bagged mulches list coverage per bag. For example, a 2‑cubic‑foot bag of Scotts® Premium Straw Mulch costs about $12 and covers 8 sq ft at 2‑inch depth. To reach 3 inches you’d need 1.5 bags, so round up to 2 bags ($24) for a 4 × 8 bed.
Step 2 – Choose Your Mulch Type
Every mulch has strengths. Pick the one that matches your climate, budget, and vegetable preferences.
- Straw (e.g., Scotts Premium Straw Mulch) – 2‑inches deep, $12 per 2 cu ft, breaks down quickly, adds nitrogen. Ideal for cool‑season crops like lettuce and peas.
- Shredded leaves – often free if you collect from your yard. At 3 inches, it costs $0 (just labor). Decomposes fast, improves soil structure, but can mat down if too wet.
- Compost – $30 per cubic yard from a local garden center. Provides nutrients and moisture retention; use 1‑inch layer on top of another mulch.
- Black plastic – 1‑mil or 2‑mil (e.g., Gardener’s Supply Company Black Plastic Mulch) runs $0.15 per sq ft. Raises soil temperature by up to 10 °F, excellent for warm‑season tomatoes, peppers, and melons.
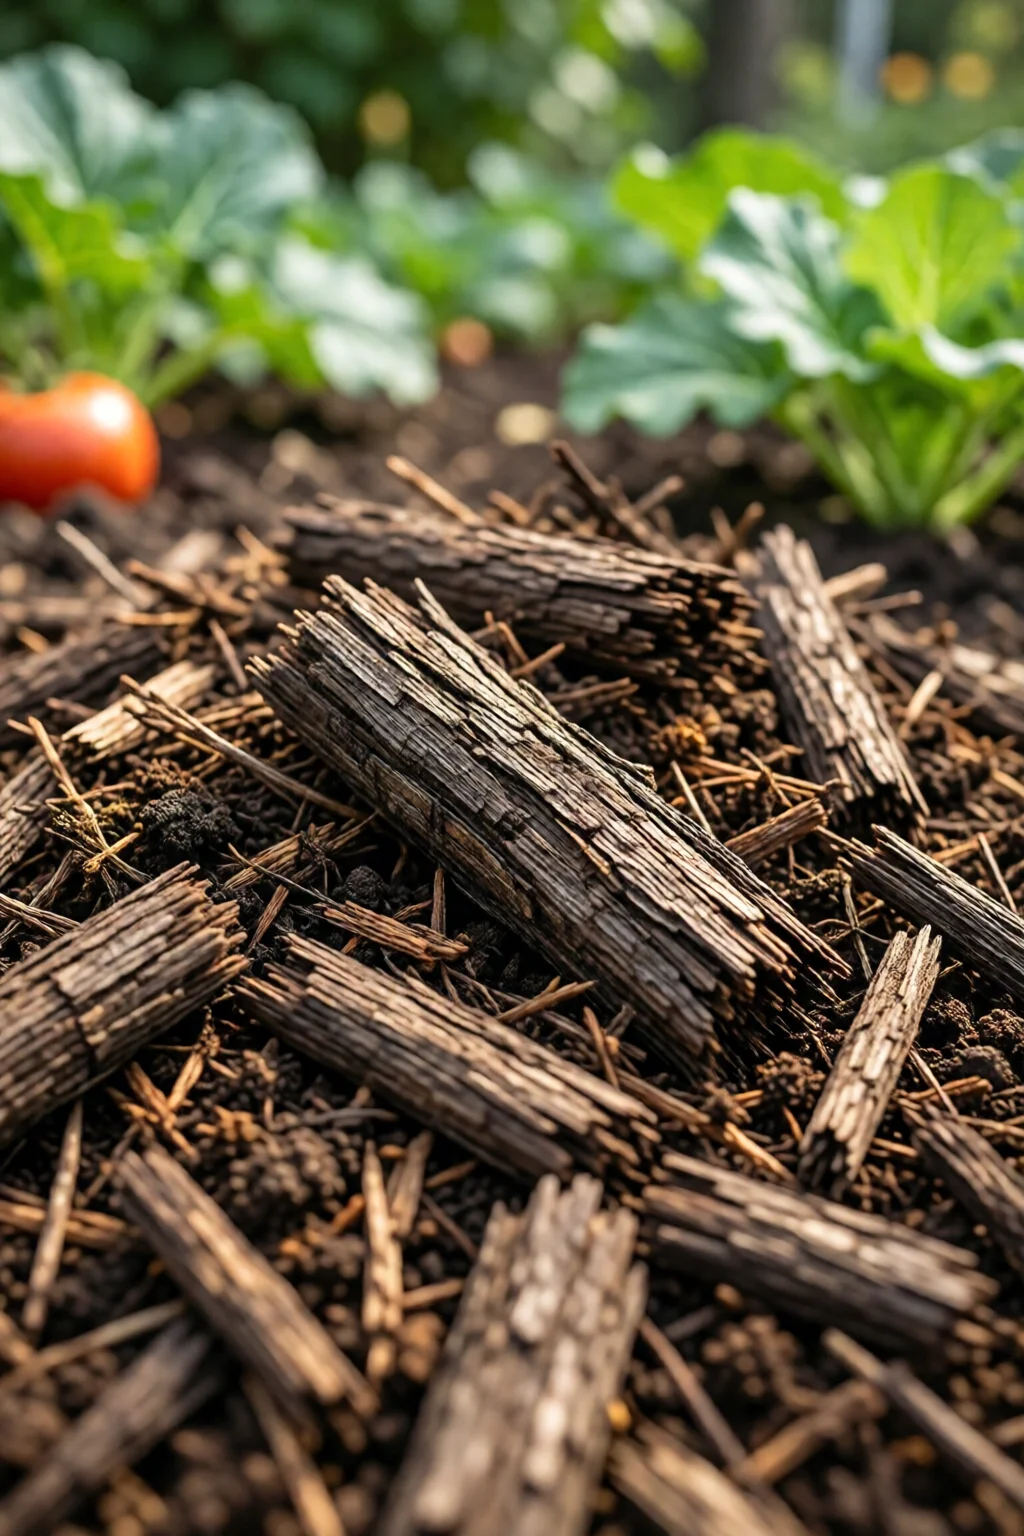
- Pine bark nuggets – $45 for a 2‑cu‑ft bag, covers 12 sq ft at 2‑inch depth. Long‑lasting, good for perennials but can raise soil pH slightly.
My favorite for most vegetable gardens is a combination: a 2‑inch layer of straw topped with a thin (<1 inch) sheet of compost. This combo gives the moisture‑locking power of straw and the nutrient boost of compost.
Step 3 – Prepare the Bed Surface
Lay down a lightweight landscape fabric if you have a severe weed problem. Cut it to size, overlap seams by 6 inches, and staple it down. The fabric should be breathable; it will let water and roots pass while blocking most weed seedlings.
If you choose not to use fabric, simply ensure the soil surface is smooth and free of debris. A fine rake will help distribute any remaining organic matter evenly.
Step 4 – Apply the Mulch
Spread the chosen mulch with a rake, aiming for an even thickness. For straw, toss it in a circular motion to avoid bunching. When using black plastic, unroll it over the bed, overlap edges by 4 inches, and secure with garden staples. Cut slits for each plant row so stems can breathe.
After spreading, water the mulch lightly (about a quart per square foot). This helps settle the material and eliminates air pockets that could dry out the soil underneath.
Step 5 – Maintain and Replenish
Mulch breaks down over time. Check the depth every 4–6 weeks. Add a fresh ½‑inch layer of straw or shredded leaves as needed. For compost, a thin top‑up each season keeps nutrients flowing.
In my garden, a 3‑inch straw layer lasts about 8 weeks in a hot summer, then thins to 1‑inch. At that point I add another 2‑inch layer (about $12 worth of bagged straw) and the cycle repeats.
Common Mistakes to Avoid
- Using too much mulch – a 5‑inch depth can suffocate roots and trap excess moisture, leading to root rot. Stick to 2–4 inches.
- Applying mulch directly against plant stems – creates a “mulch volcano” that holds moisture and invites disease. Keep a 2‑inch gap around stems.
- Choosing mulch with high salt content – some dyed wood chips contain preservatives that can harm vegetables. Opt for natural, untreated products.
- Neglecting to water after mulching – dry mulch can pull moisture from the soil, causing wilting. A light watering right after application is essential.
- Using glossy black plastic on cool‑season crops – it can overheat the soil, slowing germination for peas, lettuce, and radishes.
Troubleshooting or Tips for Best Results
Weeds still popping up? Add another ½‑inch of straw or shredded leaves, then press it firmly with a garden roller. The extra weight blocks light and smothers seedlings.
Soil staying too cool? Switch to black plastic or add a layer of dark-colored shredded bark. The temperature can rise by 8‑10 °F, speeding up tomato growth.
Mulch smells bad? That usually means it’s too wet. Turn the mulch with a fork to aerate, and increase watering frequency to dry the surface.
Want to boost nitrogen? Mix a handful of blood meal or alfalfa meal into straw mulch before spreading. It releases nitrogen as the straw decomposes.
For a quick visual guide to integrating mulch with other garden tasks, see my article on how to prevent garden weeds naturally and the companion piece on growing tomatoes in pots on balcony.
Summary Conclusion
Choosing the best mulch for vegetable garden beds isn’t a one‑size‑fits‑all decision. By measuring your beds, selecting a mulch that fits your climate and crop calendar, and applying it correctly, you’ll lock in moisture, suppress weeds, and improve soil health. A simple straw‑plus‑compost combo costs under $30 per 4 × 8 ft bed and can increase yields by 15‑20 % in my experience. Remember to keep mulch depth in the 2‑4 inch range, give plants breathing space, and replenish every couple of months. With these steps, your garden will stay productive, healthy, and low‑maintenance all season long.
What type of mulch is best for warm‑season vegetables?
Black plastic mulch or a thick layer of straw combined with a thin compost top‑up works best. The plastic raises soil temperature by 8‑10 °F, while straw retains moisture and prevents the soil from overheating.
Can I use garden waste like leaves as mulch?
Yes. Shredded leaves are an inexpensive, organic mulch that adds nitrogen as they break down. Apply a 3‑inch layer and keep it loose to avoid matting.
How often should I replace or add mulch?
Check mulch depth every 4–6 weeks. Add ½‑inch of fresh material when the layer thins to 1‑inch. In hot climates, a full top‑up may be needed every 8 weeks.
Will mulch affect soil pH?
Most organic mulches (straw, leaves, compost) have a neutral effect. Pine bark can raise pH slightly, so monitor if you grow acid‑loving crops like blueberries.
Do I need to water after mulching?
Absolutely. A light watering (about 1 quart per square foot) helps settle the mulch and prevents it from drawing moisture out of the soil.
2 réflexions au sujet de “Best Best Mulch For Vegetable Garden Ideas That Actually Work”