Ever wondered why your garden beds feel like a mud pit after a single rainstorm, even though you’re planting hardy vegetables?
In This Article
- What You Will Need Before You Start
- Step 1 – Test and Assess Your Clay Soil
- Step 2 – Incorporate Organic Matter
- Step 3 – Add Coarse Sand and Gypsum
- Step 4 – Build Raised Beds (Optional but Highly Effective)
- Step 5 – Ongoing Maintenance for Long‑Term Success
- Common Mistakes to Avoid
- Troubleshooting and Tips for Best Results
- Summary
What You Will Need Before You Start
Gathering the right tools and amendments up front saves you countless trips to the garden centre and keeps the project moving. Here’s my go‑to checklist:
- Soil test kit (e.g., Luster Leaf 1601 Professional Soil Test Kit, $19.99)
- Compost – a high‑quality, dark, crumbly variety like Miracle‑Gro All Purpose Compost (5 gal bag, $9.95)
- Well‑rotted manure (cow or horse), about 2 cubic feet per 100 sq ft
- Coarse sand or horticultural sand – I prefer Coastline Silica Sand (50 lb bag, $8.50)
- Gypsum (calcium sulfate) – Espoma Gypsum (10 lb, $7.20)
- Garden fork or a powered rototiller (1‑½ hp, $149 on sale at Home Depot)
- Mulch (shredded bark or straw), roughly 3 inches deep
- Watering hose with a gentle spray nozzle
- Measuring tape, gloves, and a sturdy wheelbarrow

Step 1 – Test and Assess Your Clay Soil
Before you add anything, you need to know exactly what you’re dealing with. A simple pH test and texture assessment will tell you if the clay is overly acidic and how compact it is. In my experience, most Midwest clays sit around pH 5.5–6.0 and have a bulk density of 1.6 g/cm³. If the pH is below 5.5, you’ll want to liming later; if it’s above 7.5, a little elemental sulfur can bring it down.
To perform the test, take a handful of moist soil, spread it thinly on a white sheet, and rub it between your fingers. Clay feels slick and sticks together; sand feels gritty. Record your observations, then use the Luster Leaf kit to get a precise pH reading.
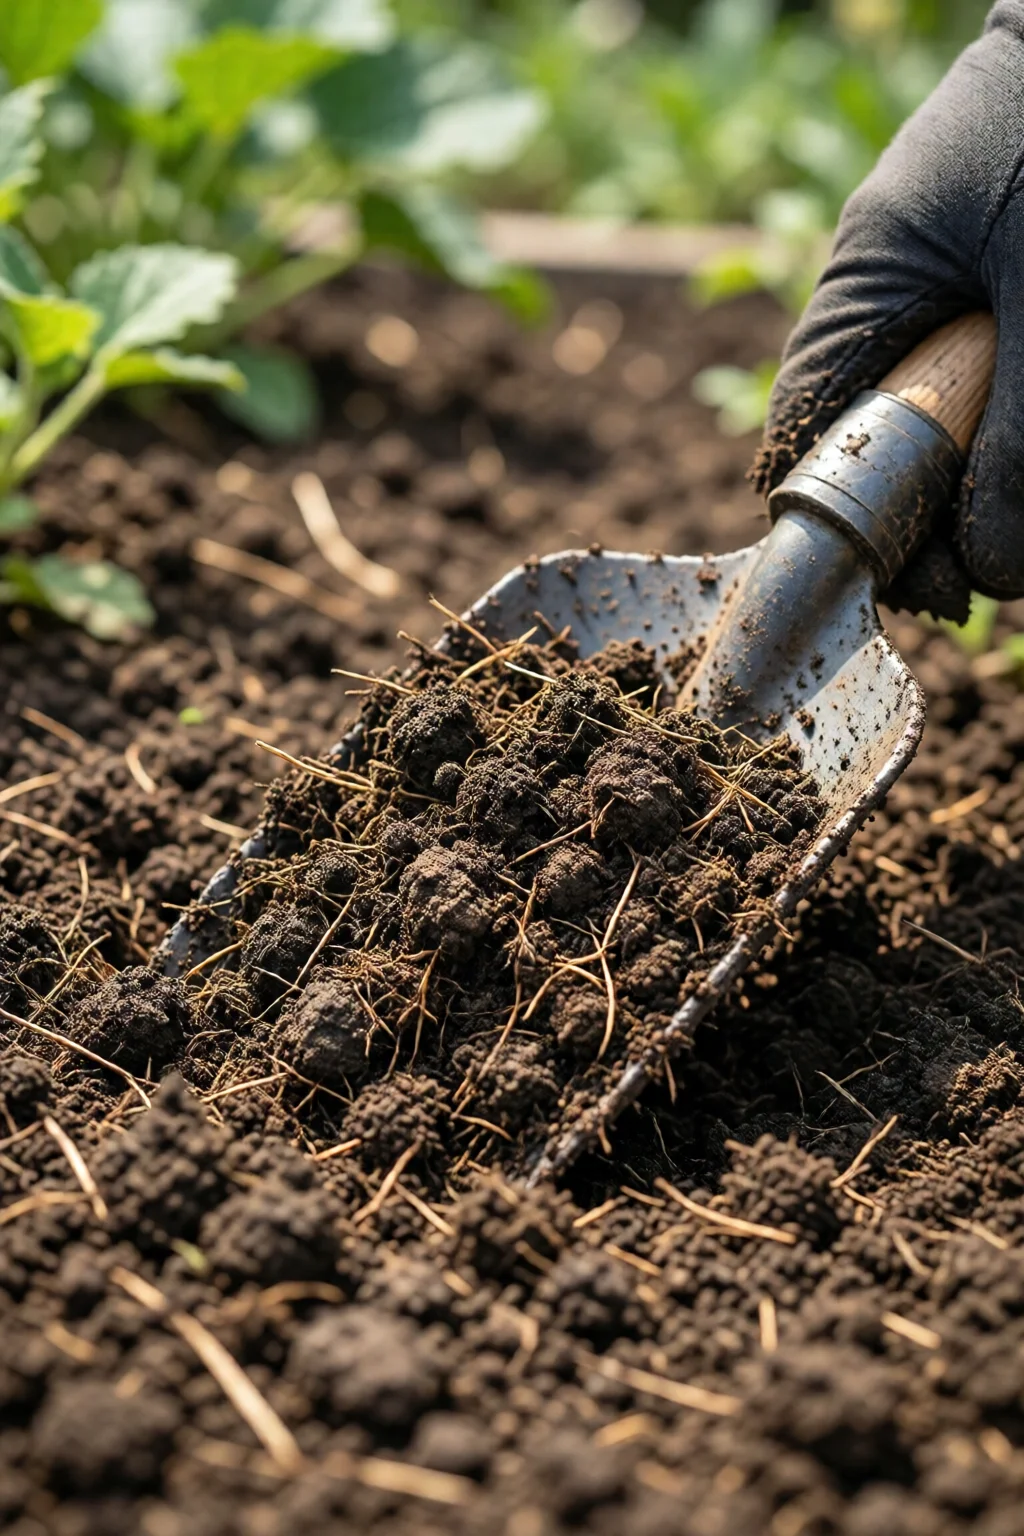
Step 2 – Incorporate Organic Matter
Organic matter is the single most effective amendment for heavy clay. It improves structure, increases microbial activity, and boosts water infiltration. Aim for a 25 % volume increase of organic material in the top 12 inches of soil. For a 10 × 10 ft garden bed, that’s roughly 2 cubic feet of compost and 1 cubic foot of well‑rotted manure.
Spread the compost evenly, then use a garden fork or rototiller to work it into the clay to a depth of 12–15 inches. I like to set the tiller to “light” for the first pass, then “medium” for a second pass to avoid over‑breaking the soil aggregates. Water the bed thoroughly after incorporation; the moisture helps the organic particles begin the “flocculation” process that loosens the dense clay particles.
Step 3 – Add Coarse Sand and Gypsum
Sand alone can create a concrete‑like mix if added in excess, so it must be paired with gypsum and plenty of organic matter. The rule of thumb is 1 part sand to 3 parts amended clay. For our 10 × 10 ft example, that works out to about 40 lb of Coastline Silica Sand.
Gypsum supplies calcium, which replaces sodium on the clay’s exchange sites, encouraging better aggregation. Sprinkle 2 lb of Espoma Gypsum per 100 sq ft and work it in with the sand and the already‑added organic material. The combination creates a crumbly, well‑draining texture without the risk of turning the bed into a sand pit.
After mixing, let the soil settle for 24 hours, then re‑test the pH. If you need to raise it, add garden lime at 5 lb per 100 sq ft; if you need to lower it, apply 1 lb of elemental sulfur per 100 sq ft.
Step 4 – Build Raised Beds (Optional but Highly Effective)
If you have persistent drainage problems or limited time, constructing raised beds can bypass many of clay’s shortcomings. A 12‑inch high bed filled with a 50/50 mix of the amended soil and premium compost yields excellent results. I’ve built 4‑foot‑wide beds using untreated pine, costing about $30 per linear foot at Home Depot.
Fill the bed in layers: first a 2‑inch layer of coarse sand for drainage, then the amended soil mix, and finish with a 2‑inch mulch blanket. This “sand‑soil‑mulch” sandwich promotes rapid root penetration and reduces surface crusting.
Step 5 – Ongoing Maintenance for Long‑Term Success
Improving clay is not a one‑time fix; it’s a seasonal commitment. Each spring, add a thin (½‑inch) layer of compost and lightly incorporate it with a fork. This replenishes organic matter lost to decomposition and keeps the soil structure loose.
Mulching is a game‑changer. A 3‑inch layer of shredded bark (about $4 per bag, covering 10 sq ft) conserves moisture, suppresses weeds, and adds a slow‑release carbon source. Also, avoid compacting the soil with heavy foot traffic—use stepping stones or a garden path.
Common Mistakes to Avoid
- Over‑sanding. Adding more than 30 % sand can create a soil that drains too quickly and loses nutrients. Stick to the 1:3 sand‑to‑clay ratio.
- Skipping the soil test. Without knowing pH and nutrient levels, you may over‑lime or under‑amend, leading to nutrient lockout.
- Using garden soil from a bag. Many commercial “soil” blends contain large amounts of peat, which can acidify clay further. Always choose a balanced “soil amendment” product.
- Neglecting drainage. Clay retains water; if you notice standing water after a moderate rain, add a French drain or increase the sand fraction.
- Compacting after amendment. Walking on fresh beds or using a heavy roller destroys the newly formed soil aggregates.

Troubleshooting and Tips for Best Results
Problem: Soil still feels sticky after amendment.
Solution: Add an extra 1‑2 inches of compost and water thoroughly. The extra organic matter will bind with the clay particles, creating a looser crumb.
Problem: Plants wilt despite regular watering.
Solution: Check for “hardpan” – a compacted layer beneath the root zone. Break it up with a garden fork or a narrow spade, then apply a ½‑inch layer of gypsum and water in.
Problem: Nutrient deficiencies appear (yellowing leaves).
Solution: Perform a follow‑up soil test after the first growing season. Apply a balanced organic fertilizer like Espoma Garden Food 4‑4‑4 at 1 lb per 100 sq ft.
For added inspiration, see my seasonal garden maintenance checklist or learn how to grow specific crops in your newly improved soil, such as how to grow sunflowers from seed, how to care for peony plants, and growing strawberries in raised beds. If you’re thinking about adding a patio, check out gravel patio ideas on a budget for ways to integrate hardscapes without compromising soil health.
Summary
Learning how to improve clay soil for gardening is all about building structure, increasing drainage, and feeding the soil with organic matter. By testing first, amending with compost, sand, and gypsum, and committing to seasonal mulching, you’ll transform a stubborn, compact mass into a fertile, airy medium that supports robust vegetable, flower, and fruit production. Remember, the key is balance—too much sand or gypsum can swing the pendulum the other way, while neglecting ongoing maintenance will erode your hard‑won gains.
How long does it take for clay soil to become loamy after amendment?
You’ll notice a noticeable difference after the first growing season, but fully loamy texture typically develops after 2–3 years of regular organic additions and mulching.
Can I use peat moss instead of compost in clay soil?
Peat moss is acidic and can lower pH further, which isn’t ideal for most clays. Compost provides both nutrients and structure, making it the preferred amendment.
Is gypsum safe for all types of clay?
Gypsum works best on sodium‑rich (alkaline) clays. For calcium‑rich clays, the benefit is less pronounced, but it still helps improve aggregation when combined with organic matter.
Do raised beds eliminate the need for soil amendment?
Raised beds improve drainage and allow you to control the soil mix, but adding compost and organic matter remains essential for long‑term fertility.
How often should I re‑test the pH of my amended clay soil?
Test at the start of each growing season. If you’re adding lime or sulfur, a mid‑season check can help you fine‑tune the balance.
3 réflexions au sujet de “How To Improve Clay Soil For Gardening: Complete Guide for 2026”