Growing sweet potatoes at home can be a rewarding experience for gardeners of any skill level. These vibrant, nutrient‑dense tubers thrive in warm climates, but with the right preparation and care, they can flourish in a typical U.S. backyard, raised bed, or even a sunny patio container. In this guide you’ll learn everything from selecting the perfect variety to harvesting, storing, and troubleshooting common issues, all while gaining expert tips that will help you enjoy a bountiful harvest year after year.
Why Choose Sweet Potatoes?
Sweet potatoes (Ipomoea batatas) are more than just a tasty side dish. They pack a nutritional punch, offering beta‑carotene, fiber, vitamin C, potassium, and antioxidants. Their vines also provide excellent ground cover, suppressing weeds and reducing soil erosion. For gardeners seeking a low‑maintenance, high‑yield crop that adds color and texture to the landscape, sweet potatoes are an ideal choice.
Selecting the Right Sweet Potato Variety
Choosing a variety that matches your climate, growing space, and culinary preferences is the first step toward success. Here are three popular groups:
Early‑Maturing Varieties (90‑100 days)
Early varieties such as ‘Beauregard’, ‘Georgia Jet’, and ‘Covington’ reach maturity quickly, making them perfect for shorter growing seasons in the northern United States. They produce large, orange‑fleshed tubers with a sweet flavor that’s great for roasting or mashing.
White‑Fleshed Varieties (110‑120 days)
If you prefer a milder, less sweet taste, consider white‑fleshed options like ‘Bonita’ or ‘Nancy Hall’. These potatoes have a creamy texture, ideal for soups and stews, and they tend to store well for longer periods.
Purple and Multi‑Color Varieties (120‑130 days)
For a striking visual addition to your garden, try ‘Purple Majesty’ or ‘Okinawan’. Their deep purple skins and flesh retain antioxidants even after cooking, making them a colorful and health‑ful choice for salads and baked dishes.
Preparing the Soil for Sweet Potatoes
Sweet potatoes love well‑drained, sandy loam soils with a pH between 5.5 and 6.5. Before planting, follow these steps to give your vines the best possible start.
Test Soil pH
Use a simple kit or a digital meter to determine your soil’s acidity. If you need to adjust pH, you can add lime to raise it or elemental sulfur to lower it. For a detailed guide, see our article on how to test soil pH at home.
Amend with Organic Matter
Incorporate 2–3 inches of compost or well‑rotted manure into the top 12 inches of soil. This improves structure, promotes drainage, and supplies essential nutrients. Avoid heavy, clay‑rich soils that retain water, as they can cause tuber rot.
Create Mounds or Raised Beds
Forming raised beds or mounds (12–18 inches high) helps maintain warmth and prevents waterlogging. If space is limited, a large container filled with a 1:1 mix of potting soil and coarse sand works beautifully.
Planting Sweet Potatoes
Unlike regular potatoes, sweet potatoes are propagated from “slips” – young shoots that grow from a mature tuber. Follow these detailed steps to plant slips successfully.
Obtaining Slips
You can purchase slips from reputable nurseries or grow your own. To generate slips at home, place a healthy sweet potato in a jar of water, half‑submerged, and keep it in a warm, sunny spot. After 2–3 weeks, sprouts will emerge. Once they reach 8–12 inches, gently twist them off, remove lower leaves, and let the roots develop in water for a few days before planting.
Timing the Planting
Plant slips after the last frost date when soil temperatures consistently stay above 65°F (18°C). In most of the United States, this means late May to early June, but in southern regions you can start as early as mid‑April.
Spacing and Depth
Space slips 12–18 inches apart in rows spaced 30–36 inches apart. Plant each slip 2–4 inches deep, covering the roots and lower stem while leaving the top leaves exposed to sunlight. This encourages vigorous vine growth and tuber development.
Watering and Fertilizing Sweet Potatoes
Proper moisture and nutrition are key to producing plump, sweet tubers.
Irrigation Practices
During the early growth stage, water consistently to keep the soil evenly moist—about 1 inch per week. Once vines start to vine and tubers form (about 4–6 weeks after planting), reduce watering to encourage the tubers to store sugars. Over‑watering at this stage can lead to watery, less‑sweet potatoes.
Fertilizer Recommendations
Apply a balanced fertilizer (10‑10‑10) at planting time, then side‑dress with a nitrogen‑rich fertilizer (such as blood meal) after the vines have established. Avoid high‑phosphorus fertilizers, as they can inhibit tuber formation. For organic gardeners, a side‑dressing of compost tea or fish emulsion works well.
Supporting Vines and Managing Growth
Sweet potatoes are vigorous climbers and can sprawl up to 10 feet if left unchecked. Managing growth helps maintain garden tidiness and improves air circulation.
Using Trellises
Install a sturdy trellis or garden netting 3–4 feet high to guide vines upward. This not only saves garden space but also reduces the risk of fungal diseases by keeping foliage off the damp soil.
Pruning Excess Vines
If vines become overly dense, trim the outermost growth to improve airflow. Be careful not to cut too aggressively; the plant needs ample leaf area for photosynthesis and tuber development.
Harvesting Sweet Potatoes
Harvest timing is crucial for achieving optimal sweetness and storage life. Sweet potatoes are typically ready 90–150 days after planting, depending on variety.
Identifying Maturity
Leaves will begin to yellow and die back when tubers are mature. Gently dig around a test plant with a garden fork, being careful not to damage the tubers. If they are 5–6 inches long and the skins are firm, the crop is ready.
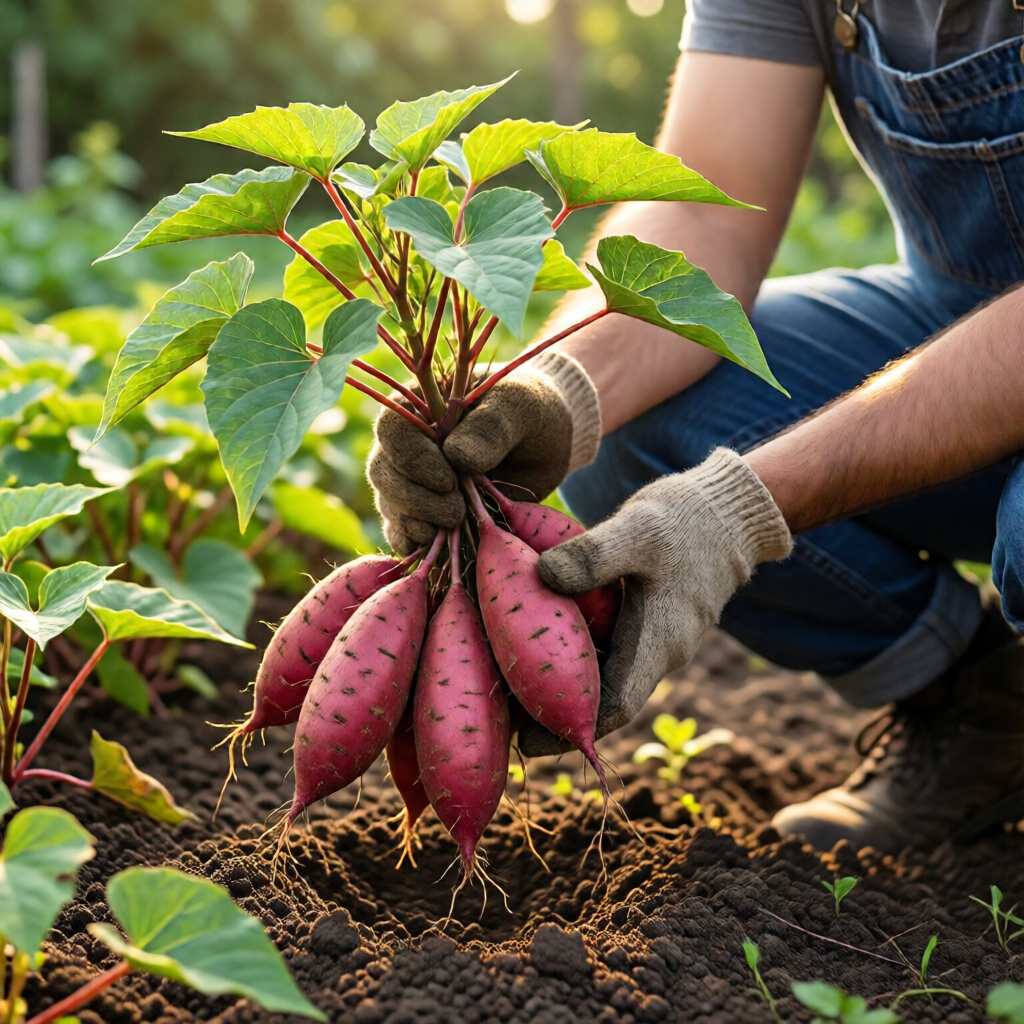
Harvest Technique
Using a spade or digging fork, loosen the soil at least 12 inches away from the plant to avoid cutting the tubers. Lift the plant carefully and shake off excess soil. For large harvests, work in sections to prevent the vines from tangling and breaking.
Curing for Sweetness
After harvesting, cure sweet potatoes in a warm (80‑85°F) and humid (85‑90% RH) environment for 10–14 days. This process converts starches to sugars, enhances flavor, and toughens the skins for storage. A simple method is to place the potatoes in a cardboard box in a sunny garage or a heated greenhouse.

Storing Sweet Potatoes
Proper storage can keep sweet potatoes fresh for up to six months. Follow these steps to maximize shelf life.
Ideal Storage Conditions
Store cured sweet potatoes in a cool (55‑60°F), well‑ventilated area with high humidity. Avoid refrigeration, as temperatures below 50°F can cause the starches to convert to sugars, resulting in an off‑flavor and hard texture.
Preventing Sprouting and Rot
Check the storage area regularly and remove any damaged or sprouting tubers promptly. Use breathable containers like burlap sacks or wooden crates to maintain airflow.
Common Pests and Diseases
While sweet potatoes are relatively resilient, they can fall victim to a few pests and diseases. Early detection and integrated pest management (IPM) strategies keep your garden healthy.
Sweet Potato Weevils
Adult weevils lay eggs in the soil, and larvae tunnel into tubers, causing damage. Use sticky traps to monitor adult populations, and rotate crops annually to break the life cycle.
Root Rot (Fusarium spp.)
Excess moisture and poorly drained soils promote fungal root rot. Ensure proper drainage, avoid over‑watering, and practice crop rotation with non‑solanaceous plants.
Leaf Spot and Powdery Mildew
Leaf spot appears as brown lesions, while powdery mildew shows as a white powdery coating. Apply neem oil or a sulfur spray early in the season, and maintain good airflow by pruning excess foliage.
Companion Planting Benefits
Strategic companion planting can deter pests, improve soil health, and boost yields.
Marigolds and Nasturtiums
These bright annuals repel nematodes and beetles, reducing pressure on sweet potatoes. Plant them around the perimeter of your sweet potato bed.
Legumes (Beans, Peas)
Legumes fix nitrogen, enriching the soil for the heavy‑feeding sweet potatoes. Interplant with beans on trellises to maximize vertical space.
Herbs (Basil, Rosemary)
Herbs emit aromatic compounds that deter aphids and spider mites. Plant them at the base of sweet potato vines for continuous protection.
Growing Sweet Potatoes in Containers
If you lack garden space, containers provide an excellent alternative. Choose a pot at least 15 gallons in size, filled with a well‑draining mixture of potting soil, compost, and coarse sand. Follow the same slip planting and watering schedule, but monitor moisture closely as containers dry out faster. For more container‑growing ideas, read our guide on how to grow potatoes in containers.
From Garden to Table: Using Sweet Potatoes
Sweet potatoes are versatile in the kitchen. Here are a few popular preparations:
Roasted Sweet Potato Wedges
Cut tubers into wedges, toss with olive oil, sea salt, and rosemary, then roast at 425°F for 25–30 minutes until caramelized.
Mashed Sweet Potatoes
Boil peeled sweet potatoes until tender, mash with butter, a splash of maple syrup, and a pinch of cinnamon for a comforting side dish.
Sweet Potato Soup
Combine roasted sweet potatoes with sautéed onions, garlic, vegetable broth, and a dash of ginger. Blend until smooth for a velvety, nutrient‑rich soup.
Sweet Potato Fries
Slice tubers into thin sticks, coat lightly with cornstarch, bake at 450°F for 20 minutes, turning halfway for crispness.
Season Extension Tips
In cooler climates, you can extend the growing season using simple techniques.
Starting Slips Indoors
Begin slips 6–8 weeks before the last frost in a sunny windowsill. Transplant them outdoors once soil temperatures are consistently warm.
Using Row Covers
Place lightweight row covers over the beds to trap heat and protect young vines from unexpected cold snaps.
Mulching for Warmth
Apply a 2‑inch layer of straw or shredded leaves after planting to retain soil heat and moisture.
Harvest Calendar by Region
Below is a quick reference for planting and harvesting sweet potatoes across major U.S. regions:
| Region | Planting (after last frost) | Harvest |
|---|---|---|
| Pacific Northwest (e.g., Seattle) | Late May | Early September |
| Mid‑Atlantic (e.g., Virginia) | Mid‑May | Mid‑October |
| Southern (e.g., Texas) | Early April | Late September |
| Midwest (e.g., Illinois) | Late May | Early October |
| Northeast (e.g., New York) | Late May | Early October |
Frequently Overlooked Tips for Success
Even seasoned gardeners can miss these small but impactful details:
- Rotate Crops – Avoid planting sweet potatoes in the same spot more than once every three years to reduce disease buildup.
- Watch for Soil Compaction – Use a broadfork instead of a spade when loosening soil around mature vines to preserve soil structure.
- Harvest Early for Smaller Tubers – If you prefer baby sweet potatoes, harvest when they are 3–4 inches long; they have a delicate texture and can be boiled whole.
- Use Organic Mulch – Leaves, pine needles, or straw not only retain moisture but also add organic matter as they decompose.
- Keep Vines Clean – Periodically trim any dead or diseased foliage to reduce pest habitats.
Conclusion: Your Sweet Potato Journey Begins
From selecting the right variety to curing, storing, and enjoying your harvest, growing sweet potatoes at home is a fulfilling adventure that yields delicious, nutritious results. By following the expert advice outlined in this guide, you’ll be well equipped to cultivate a thriving sweet potato patch, whether in a spacious garden bed, a raised planter, or a sunny container. Embrace the process, experiment with varieties, and soon you’ll be sharing the sweet taste of homegrown success with family and friends.

When is the best time to plant sweet potato slips in the United States?
Plant sweet potato slips after the last frost date when soil temperatures are consistently above 65°F (18°C). In most U.S. regions this falls between late May and early June, but in southern states you can start as early as mid‑April.
How do I cure sweet potatoes after harvesting?
Cure sweet potatoes in a warm (80‑85°F) and humid (85‑90% relative humidity) environment for 10–14 days. This can be done by placing them in a cardboard box in a sunny garage or a heated greenhouse. Curing converts starches to sugars and toughens the skins for storage.
Can I grow sweet potatoes in containers?
Yes, sweet potatoes thrive in large containers (at least 15‑gallon). Use a well‑draining mix of potting soil, compost, and coarse sand, and follow the same slip planting and watering schedule, monitoring moisture more closely than in the ground.
What are the most common pests that affect sweet potatoes?
The primary pests are sweet potato weevils, which lay eggs in the soil, and various leaf‑feeding insects such as aphids and spider mites. Use sticky traps, neem oil sprays, and rotate crops annually to manage these pests.
How should I store cured sweet potatoes for long‑term use?
Store cured sweet potatoes in a cool (55‑60°F), well‑ventilated area with high humidity. Avoid refrigeration, as temperatures below 50°F can cause the starches to convert to sugars, resulting in a hard texture. Use breathable containers like burlap sacks or wooden crates.
1 réflexion au sujet de « How To Grow Sweet Potatoes At Home – Expert Guide and Ideas »