Welcome to the ultimate guide on growing microgreens at home! Whether you’re a seasoned gardener looking to add a fresh, nutrient‑dense garnish to your dishes, or a complete beginner eager to start a low‑maintenance indoor garden, this tutorial will walk you through every step. From selecting the right seeds to harvesting a vibrant, flavorful crop, we’ll share expert advice, practical tips, and actionable strategies that make microgreen cultivation both simple and rewarding.
What Are Microgreens and Why Grow Them?
Microgreens are young, tender seedlings harvested just after the first true leaves appear, typically 7‑21 days after sowing. Although they’re small, they pack a powerful punch of vitamins, minerals, antioxidants, and phytonutrients—often surpassing the nutritional content of mature greens. Their delicate flavors range from mildly sweet (like pea shoots) to peppery (like radish), making them perfect for salads, sandwiches, smoothies, and garnishes.
Health Benefits of Home‑Grown Microgreens
Research shows that microgreens can contain up to 40 times the concentration of certain nutrients compared to their mature counterparts. Here are a few key benefits:
- Vitamin boost: High levels of vitamins A, C, E, and K.
- Mineral density: Rich in iron, calcium, magnesium, and potassium.
- Antioxidant power: Compounds that help combat oxidative stress.
- Digestive aid: Fiber content supports healthy digestion.
- Low‑calorie snack: Nutrient‑dense without adding many calories.
Choosing the Right Seeds
Not all seeds are created equal when it comes to microgreens. Some of the most popular varieties include radish, broccoli, kale, sunflower, pea, beet, and cilantro. When selecting seeds, look for the following criteria:
- Certified organic: Reduces the risk of contaminants.
- High germination rate: Ensures a vigorous stand.
- Flavor profile: Choose based on your culinary preferences.
- Growth speed: Some, like radish, are ready in 7‑10 days, while others, like sunflower, take up to 14 days.
For a quick win, try the how to grow radishes fast guide—radish microgreens are among the fastest and easiest to cultivate.
Essential Equipment and Supplies
Starting a microgreen garden doesn’t require a sprawling greenhouse; a few simple tools are enough. Below is a checklist of the basics you’ll need:
- Growing trays: Shallow, food‑grade trays with drainage holes (plastic or biodegradable).
- Growing medium: Options include coconut coir, peat‑based mixes, vermiculite, or a simple seed‑starting soil.
- Seeds: High‑quality, preferably organic.
- Spray bottle: For gentle, mist‑style watering.
- Light source: Natural windowsill (south‑facing) or LED grow lights (see best grow lights for indoor plants).
- Cover: Clear plastic domes or reusable greenhouse covers to maintain humidity during germination.
- Timer (optional): For automated light cycles.
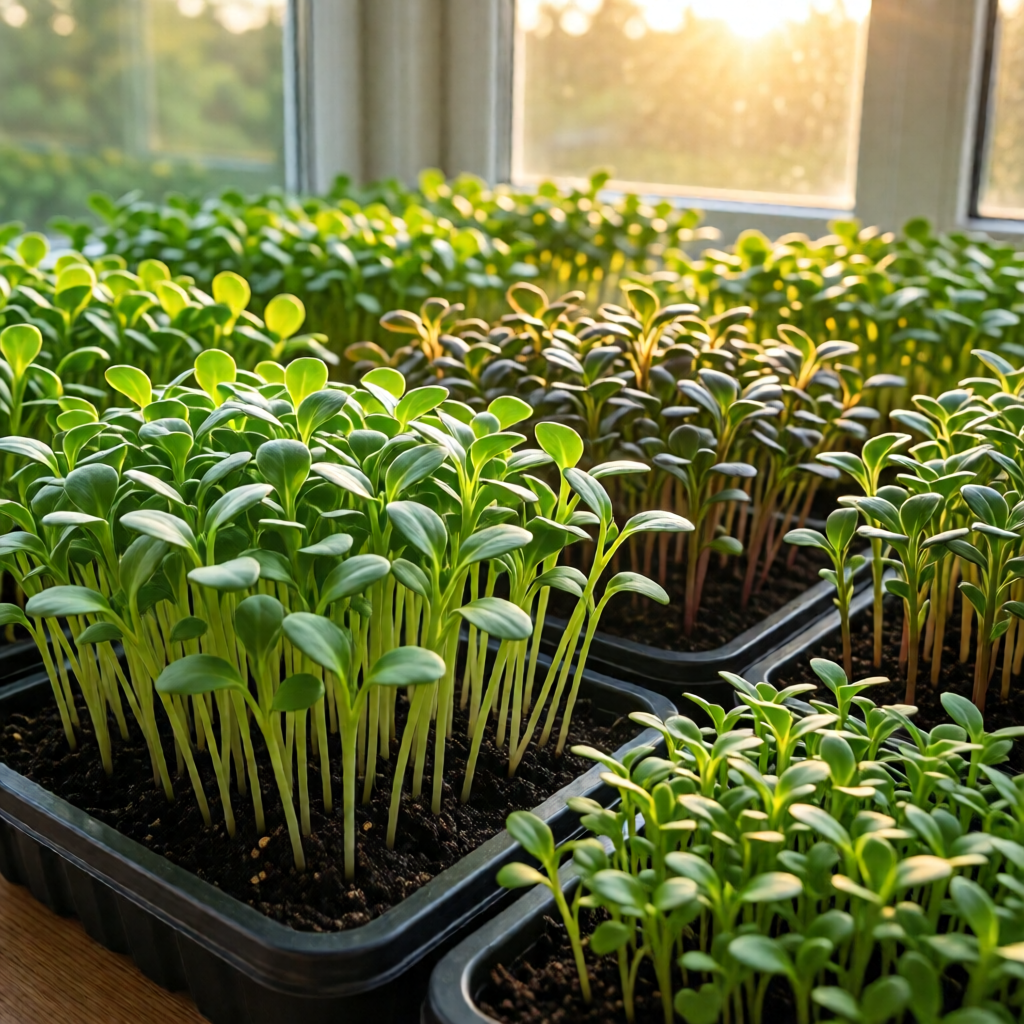
Having the right equipment sets the stage for consistent, high‑quality harvests. Below is a visual overview of a typical microgreen setup.

Preparing Your Growing Medium
The growing medium provides support, moisture retention, and aeration. Here’s how to prepare three common options:
Coconut Coir
Coir is sustainable, retains moisture well, and offers excellent drainage. Soak a block of compressed coir in water for 15‑20 minutes, then fluff it to a light, airy texture. Spread a ½‑inch layer in each tray, smoothing the surface.
Peat‑Based Mix
Mix equal parts peat moss and perlite for a light, well‑draining medium. Moisten the mix until it feels damp but not soggy, then fill trays to a depth of about ½ inch.
Vermiculite
Vermiculite holds moisture and provides a sterile environment. It’s especially useful for fast‑germinating seeds like radish. Lightly dust the tray surface and gently pat to create an even layer.
Lighting: Natural vs. Artificial
Microgreens require 12‑16 hours of light daily for optimal growth. While a sunny windowsill can work, many indoor gardeners prefer LED grow lights for consistency. Here are key considerations:
- Light intensity: Aim for 30‑50 µmol·m⁻²·s⁻¹ at the canopy level.
- Spectrum: Full‑spectrum LEDs (400‑700 nm) mimic natural sunlight.
- Distance: Position lights 6‑12 inches above the tray, adjusting as plants grow.
- Energy efficiency: LED lights use less electricity and generate less heat.
If you’re on a budget, start with a simple 12‑inch LED panel and upgrade as needed.
Step‑by‑Step Tutorial: Growing Microgreens from Seed to Harvest
Follow this detailed process to achieve lush, ready‑to‑eat microgreens in as little as a week.
1. Sterilize Your Trays
Before each grow, wash trays with warm, soapy water, rinse thoroughly, and let them air‑dry. For extra precaution, wipe the surface with a diluted bleach solution (1 tsp bleach per gallon of water) and rinse again.
2. Fill the Tray with Growing Medium
Spread your chosen medium to a uniform depth of ½‑inch. Lightly press the surface to eliminate air pockets, but avoid compacting it.
3. Pre‑Moisten the Medium
Using a spray bottle, mist the surface until evenly damp. The medium should feel moist to the touch, not waterlogged.
4. Evenly Distribute Seeds
Scatter seeds across the surface. For a dense stand, aim for ¼‑½ inch spacing between seeds. Larger seeds (like sunflower) may need more space, while tiny seeds (radish) can be spread more densely.
5. Lightly Cover Seeds
Some growers tap the tray gently to press seeds into the medium, while others lightly dust a thin layer of additional medium over the seeds. This helps retain moisture and encourages uniform germination.
6. Create a Humid Environment
Cover the tray with a clear dome or reusable greenhouse cover. This maintains humidity and darkness, promoting rapid germination. Keep the covered tray in a warm spot (70‑75°F) for 2‑4 days.
7. Monitor Germination
Check daily for sprouting. Once 50‑70% of seeds have emerged, remove the cover to expose seedlings to light.
8. Provide Adequate Light
Place the tray under your chosen light source. If using natural sunlight, a south‑facing windowsill works well. Ensure 12‑16 hours of light per day, using a timer if necessary.
9. Water Gently
Microgreens have shallow roots, so over‑watering can cause damping‑off disease. Mist the tops lightly once or twice daily, or use a fine‑spray watering can to avoid dislodging seedlings.
10. Harvest at the Right Time
Harvest when the first true leaves appear and the stems are 1‑3 inches tall. Use clean scissors or a sharp knife to cut just above the growing medium. Rinse gently and pat dry before eating.
11. Store Your Harvest
Place harvested microgreens in a sealed container or a damp paper towel in the refrigerator. They stay fresh for up to a week, though they’re best enjoyed within 2‑3 days for peak flavor.
Following these steps consistently will yield a continuous supply of vibrant microgreens, perfect for daily meals.

Common Problems and How to Solve Them
Even experienced growers encounter challenges. Below are frequent issues and proven solutions.
Damping‑Off Disease
Symptoms: Seedlings become mushy, wilt, and collapse. Solution: Ensure good air circulation, avoid over‑watering, and sterilize trays. Using a sterile seed‑starting mix reduces pathogen load.
Leggy or Spindly Growth
Symptoms: Stems stretch thin, leaves pale. Solution: Provide more light intensity or move the tray closer to the light source. Reduce the distance between the light and the canopy.
Uneven Germination
Symptoms: Patchy areas with sparse seedlings. Solution: Distribute seeds more evenly and ensure the medium is uniformly moist. A gentle shake of the tray after covering can help seeds settle.
Yellowing Leaves
Symptoms: Leaves turn yellow despite adequate light. Solution: Check for nutrient deficiencies—though microgreens require minimal feeding, a light dose of liquid fertilizer (½‑¼ strength) can help.
Bad Odor
Symptoms: Sour or moldy smell. Solution: Increase airflow, remove excess moisture, and discard any trays showing mold growth.
By diagnosing these problems early, you can maintain healthy, vigorous microgreens throughout the growing cycle.
Scaling Up: From One Tray to a Mini‑Microgreen Farm
Once you master a single tray, expanding your operation is straightforward. Consider these strategies:
- Stackable racks: Use tiered shelving to maximize vertical space while keeping each tray accessible.
- Automated watering systems: Drip mats or misting fans reduce manual effort.
- LED grow light arrays: Larger panels provide uniform coverage for multiple trays.
- Batch planting: Stagger sowing dates (e.g., every 3‑4 days) for a continuous harvest.
- Variety rotation: Alternate fast‑growing radish with slower broccoli to keep a diverse supply.
With a modest investment in racks and lighting, a hobbyist can produce enough microgreens to supply a small family or even a local café.
Creative Uses for Home‑Grown Microgreens
Microgreens are more than a garnish; they’re a versatile ingredient. Here are some ideas to incorporate them into everyday meals:
- Salads: Toss a handful with mixed greens, citrus vinaigrette, and toasted nuts.
- Sandwiches & wraps: Add crunch and color to turkey, avocado, or hummus wraps.
- Smoothies: Blend a small handful into fruit smoothies for a nutrient boost.
- Soups: Sprinkle on top of pureed soups for texture and visual appeal.
- Egg dishes: Fold microgreens into omelets, scrambled eggs, or frittatas just before serving.
Experiment with flavor pairings—peppery arugula microgreens pair beautifully with creamy cheese, while sweet pea shoots complement spicy Asian sauces.

Environmental and Cost Benefits of Growing Microgreens at Home
Microgreen cultivation is a sustainable practice that reduces food miles, packaging waste, and water usage compared to traditional vegetable production. Here’s a quick breakdown:
- Water efficiency: Microgreens use 70‑90% less water than field-grown crops.
- Space efficiency: One square foot can yield up to 1 pound of microgreens per harvest.
- Reduced waste: No stems or leaves are discarded; the entire plant is edible.
- Cost savings: A single tray of seeds and growing medium costs under $5, producing a harvest worth $10‑$15 at grocery store prices.
By growing microgreens at home, you contribute to a greener planet while enjoying fresh, nutritious greens year‑round.
Integrating Microgreens with Other Garden Projects
If you already have a garden, microgreens can complement larger planting schemes. For example, you can use the container vegetable gardening for beginners guide to create a mixed indoor/outdoor system, where microgreens provide quick harvests while tomatoes or peppers mature over the season. Additionally, planting best ground cover plants for shade around your outdoor beds can improve soil health, indirectly benefiting any seedlings you transplant from microgreen trays.
Seasonal Considerations and Year‑Round Production
One of the biggest advantages of indoor microgreen growing is the ability to harvest year‑round, regardless of external weather. However, adjusting light intensity and temperature according to the season can improve results:
- Winter: Increase light duration to 14‑16 hours; maintain ambient temperature around 68‑72°F.
- Summer: Ensure adequate ventilation to avoid overheating; consider using a fan for air circulation.
- Spring/Fall: Align planting schedules with the spring vegetable garden planting schedule for seamless integration of outdoor and indoor crops.
By fine‑tuning these parameters, you’ll achieve consistent growth and flavor throughout the year.
Harvest Storage and Food Safety
After harvesting, proper handling ensures food safety and extends shelf life:
- Rinse gently: Use cold, filtered water to remove any seed fragments.
- Dry thoroughly: Pat with a clean kitchen towel or use a salad spinner.
- Store in airtight containers: Place a paper towel at the bottom to absorb excess moisture.
- Label with date: Microgreens are best consumed within 3‑5 days for optimal flavor.
If you notice any off‑odors or discoloration, discard the affected portions to avoid foodborne illness.
Frequently Overlooked Tips for Success
Even seasoned growers can benefit from these nuanced pointers:
- Rotate trays: Turn trays 180° halfway through the light cycle to promote even growth.
- Use filtered water: Hard water can leave mineral deposits that affect seed germination.
- Pre‑soak seeds: Soaking larger seeds (e.g., sunflower) for 2‑4 hours can accelerate germination.
- Mind the pH: Aim for a slightly acidic medium (pH 6.0‑6.5) for most microgreens.
- Harvest with clean tools: Sterilize scissors or knives with rubbing alcohol before each cut.
Implementing these small adjustments can dramatically improve yield quality and consistency.
Conclusion: Your Path to Fresh, Nutritious Microgreens
Growing microgreens at home is a rewarding endeavor that blends culinary creativity with sustainable living. By selecting the right seeds, preparing a clean growing environment, providing adequate light, and mastering the harvest timing, you’ll enjoy a continuous supply of vibrant, nutrient‑dense greens that enhance any dish. Whether you start with a single tray or expand into a multi‑tiered indoor garden, the principles outlined in this tutorial will guide you toward success.
Ready to embark on your microgreen journey? Gather your supplies, follow the step‑by‑step guide, and watch your kitchen transform into a miniature farm of flavor and health.
What are the best seeds for beginners?
Radish, broccoli, and pea shoots are excellent for beginners because they germinate quickly, require minimal care, and produce tasty, nutritious greens within 7‑14 days.
Do I need special grow lights for microgreens?
While a sunny windowsill can work, full‑spectrum LED grow lights provide consistent intensity and duration, ensuring reliable growth, especially in low‑light seasons.
How often should I water microgreen trays?
Mist the surface lightly 1‑2 times daily. Over‑watering can cause damping‑off, so keep the medium moist but not soggy.
Can I grow microgreens year‑round?
Yes. With indoor lighting and temperature control, microgreens can be harvested continuously regardless of the outdoor season.
How long can harvested microgreens be stored?
When kept in a sealed container with a damp paper towel in the refrigerator, microgreens stay fresh for 3‑5 days, though they are best eaten within 2 days for peak flavor.